Advanced Reporting (For the video tutorial, click here)
Advanced reporting / Scheduled reports allows you to design, create, and receive your own daily, weekly, or monthly reports according to your specific needs.
Run an Advanced Report
Create a Report Template
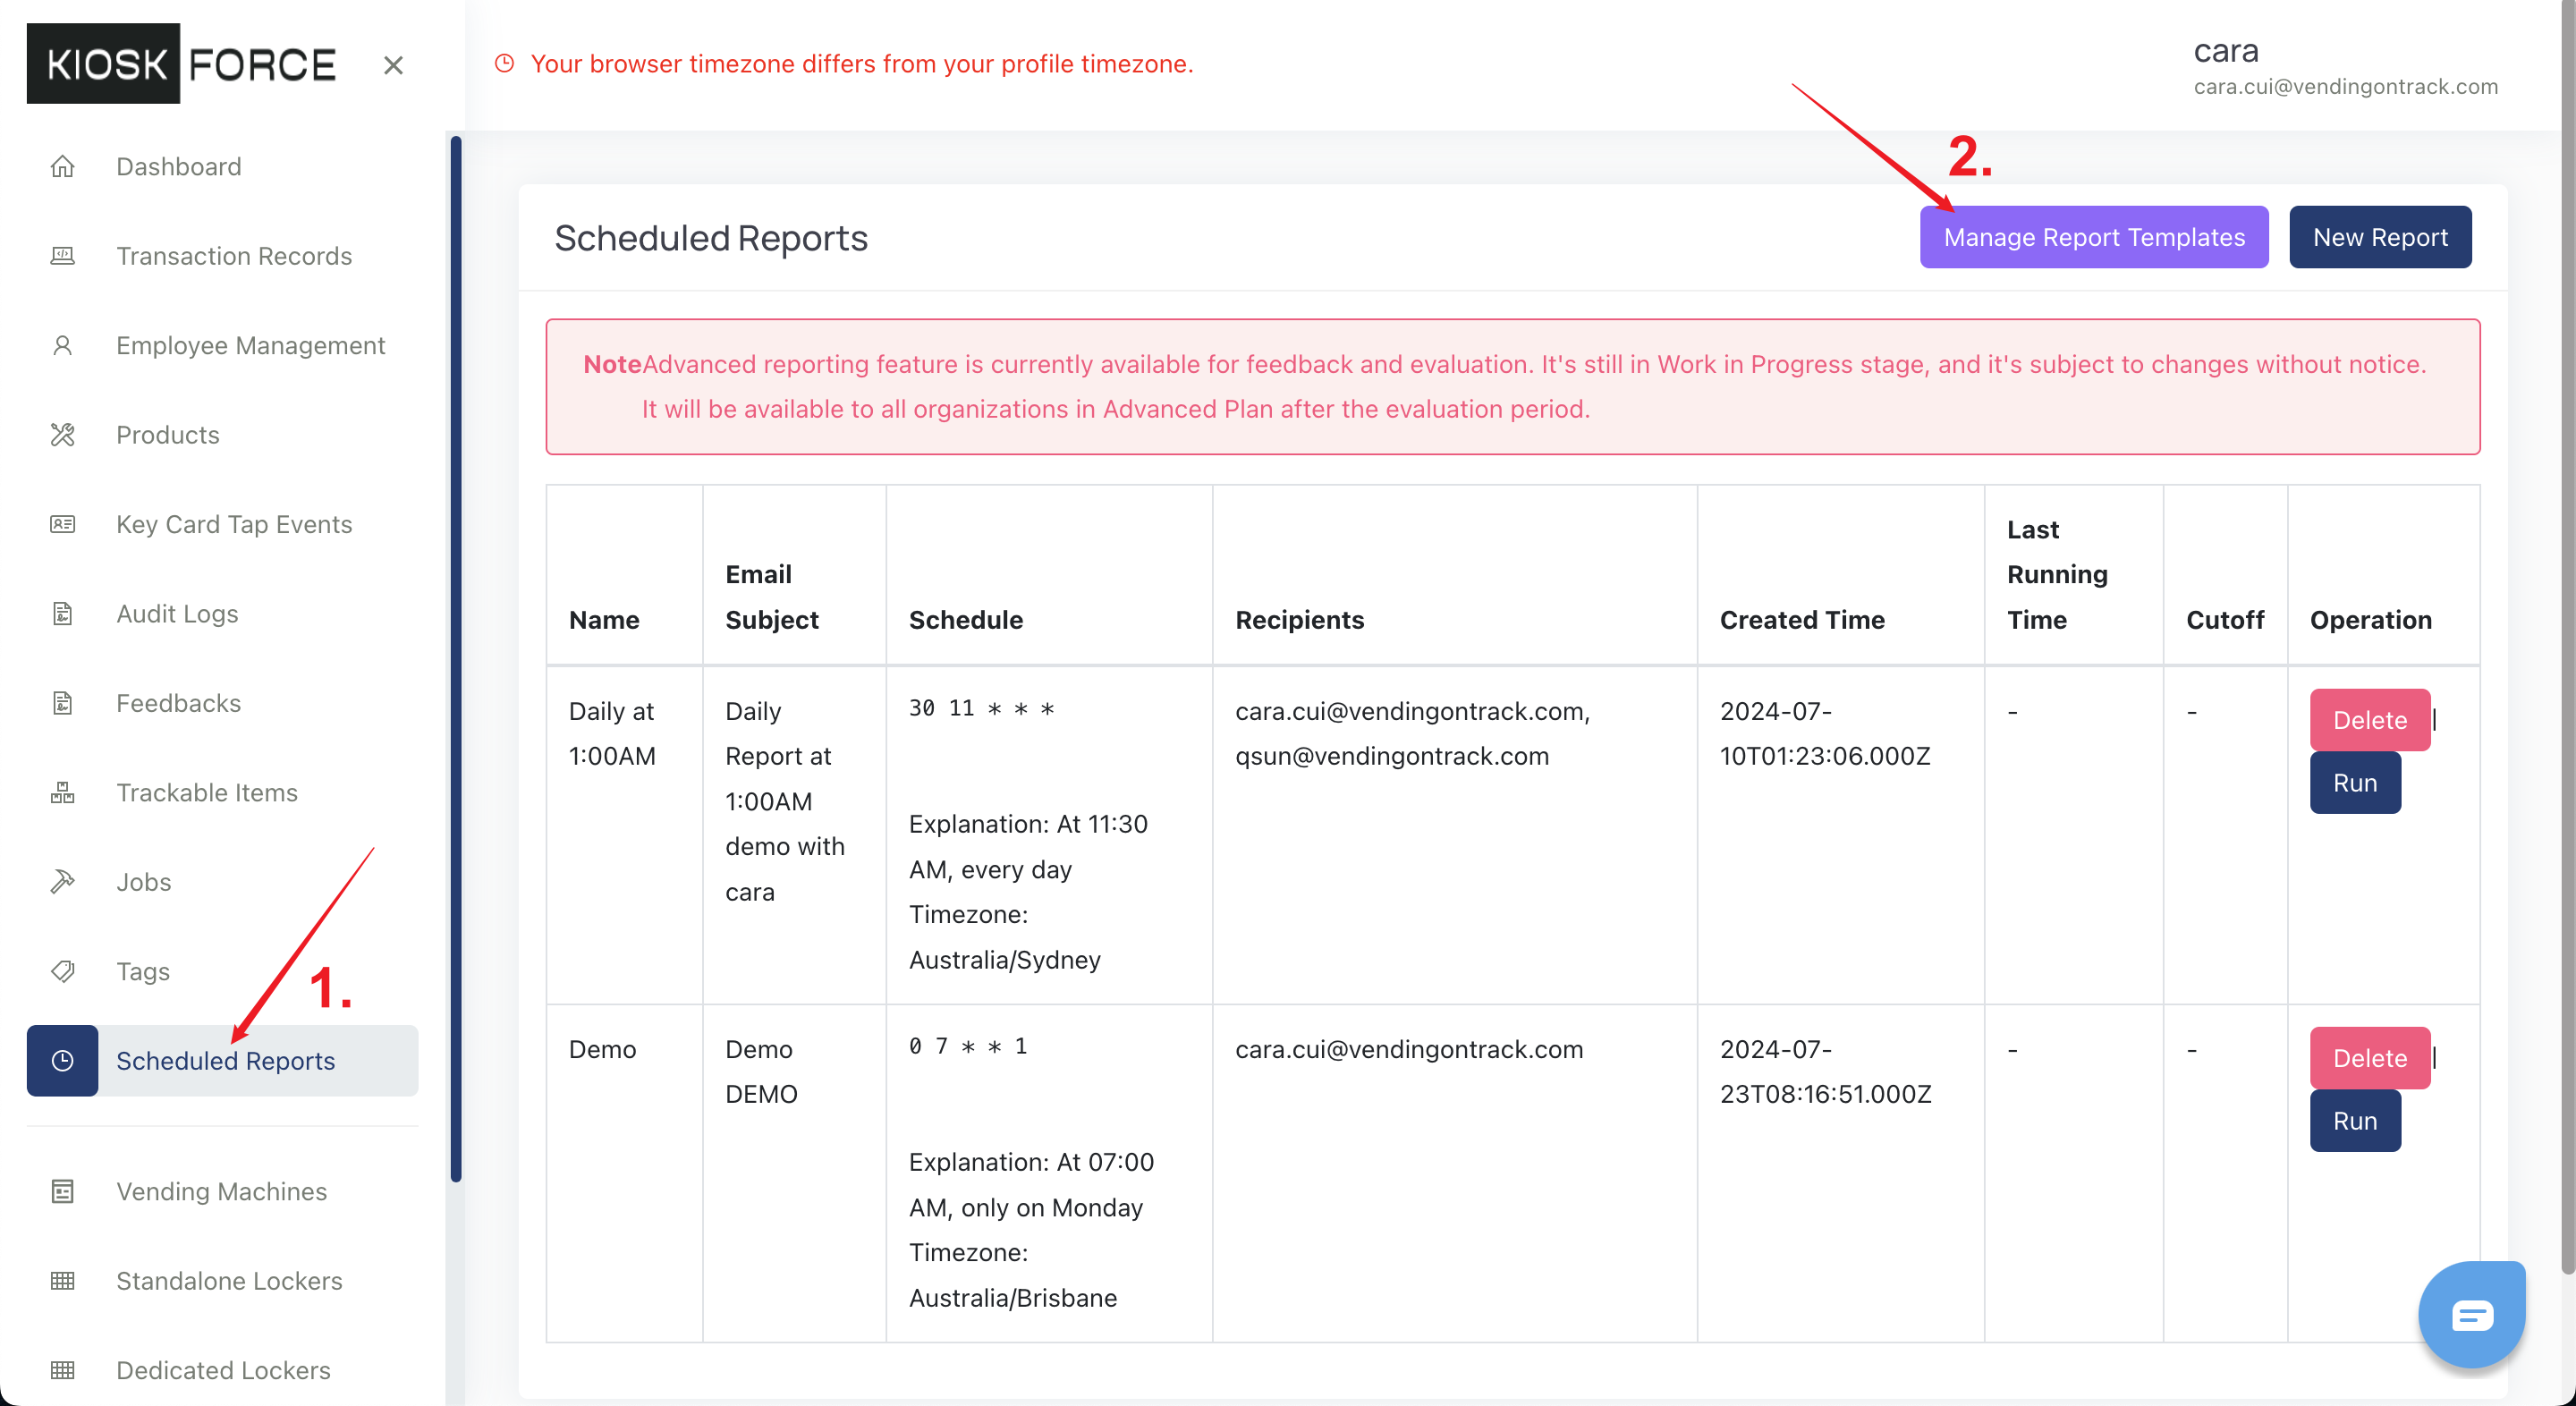
- Go to the Scheduled Reports page
- Click the Manage Report Templates button
- On the Templates page, click Download Report Template
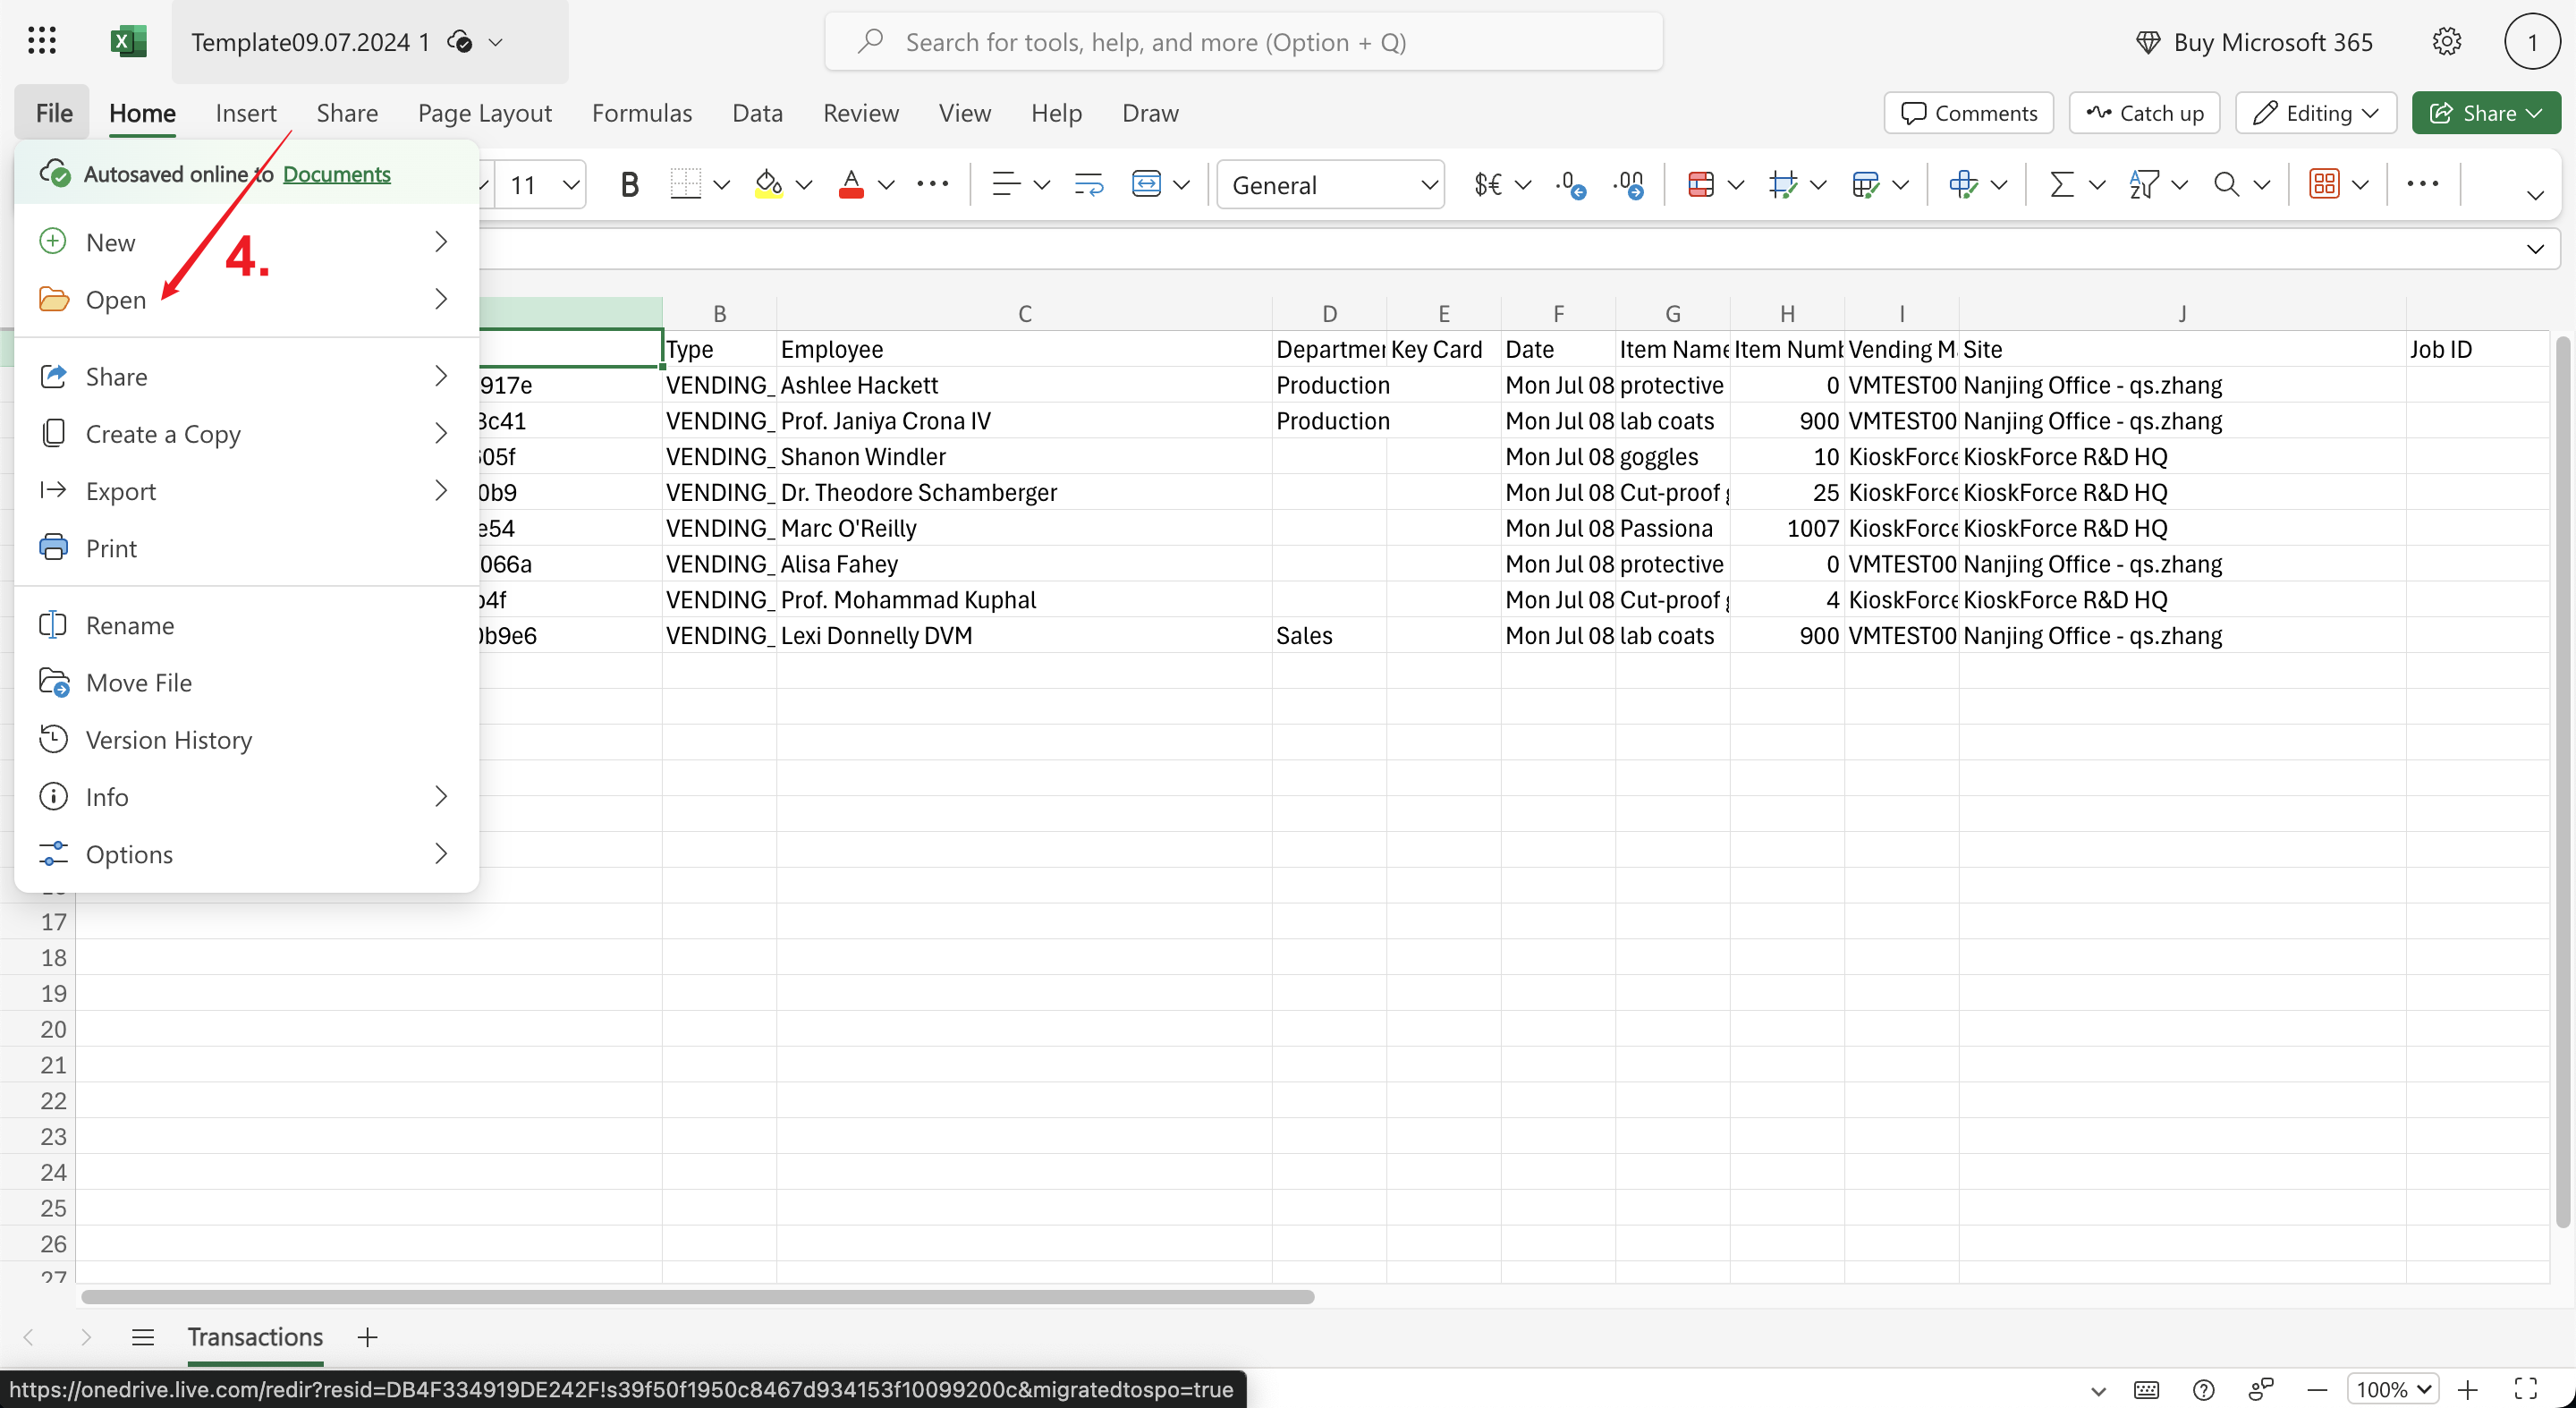
- Open the downloaded file in Microsoft Excel and compose your own report template (For more instructions on this step, please refer to our YouTube video, e.g., how to insert a pivot table and how to transform the cell format.)
- Click File and Download a Copy to save the template in the format of excel.


NOTES:
- Microsoft Excel is the only tool you can use to modify and save the report template.
- After inserting any tables or charts, check the Refresh data on file open box.
- The report template should be in Excel format. (A CSV table will not work in the system.)
Upload the Report Template
- Go to the Scheduled Reports page
- Click the Manage Report Templates button
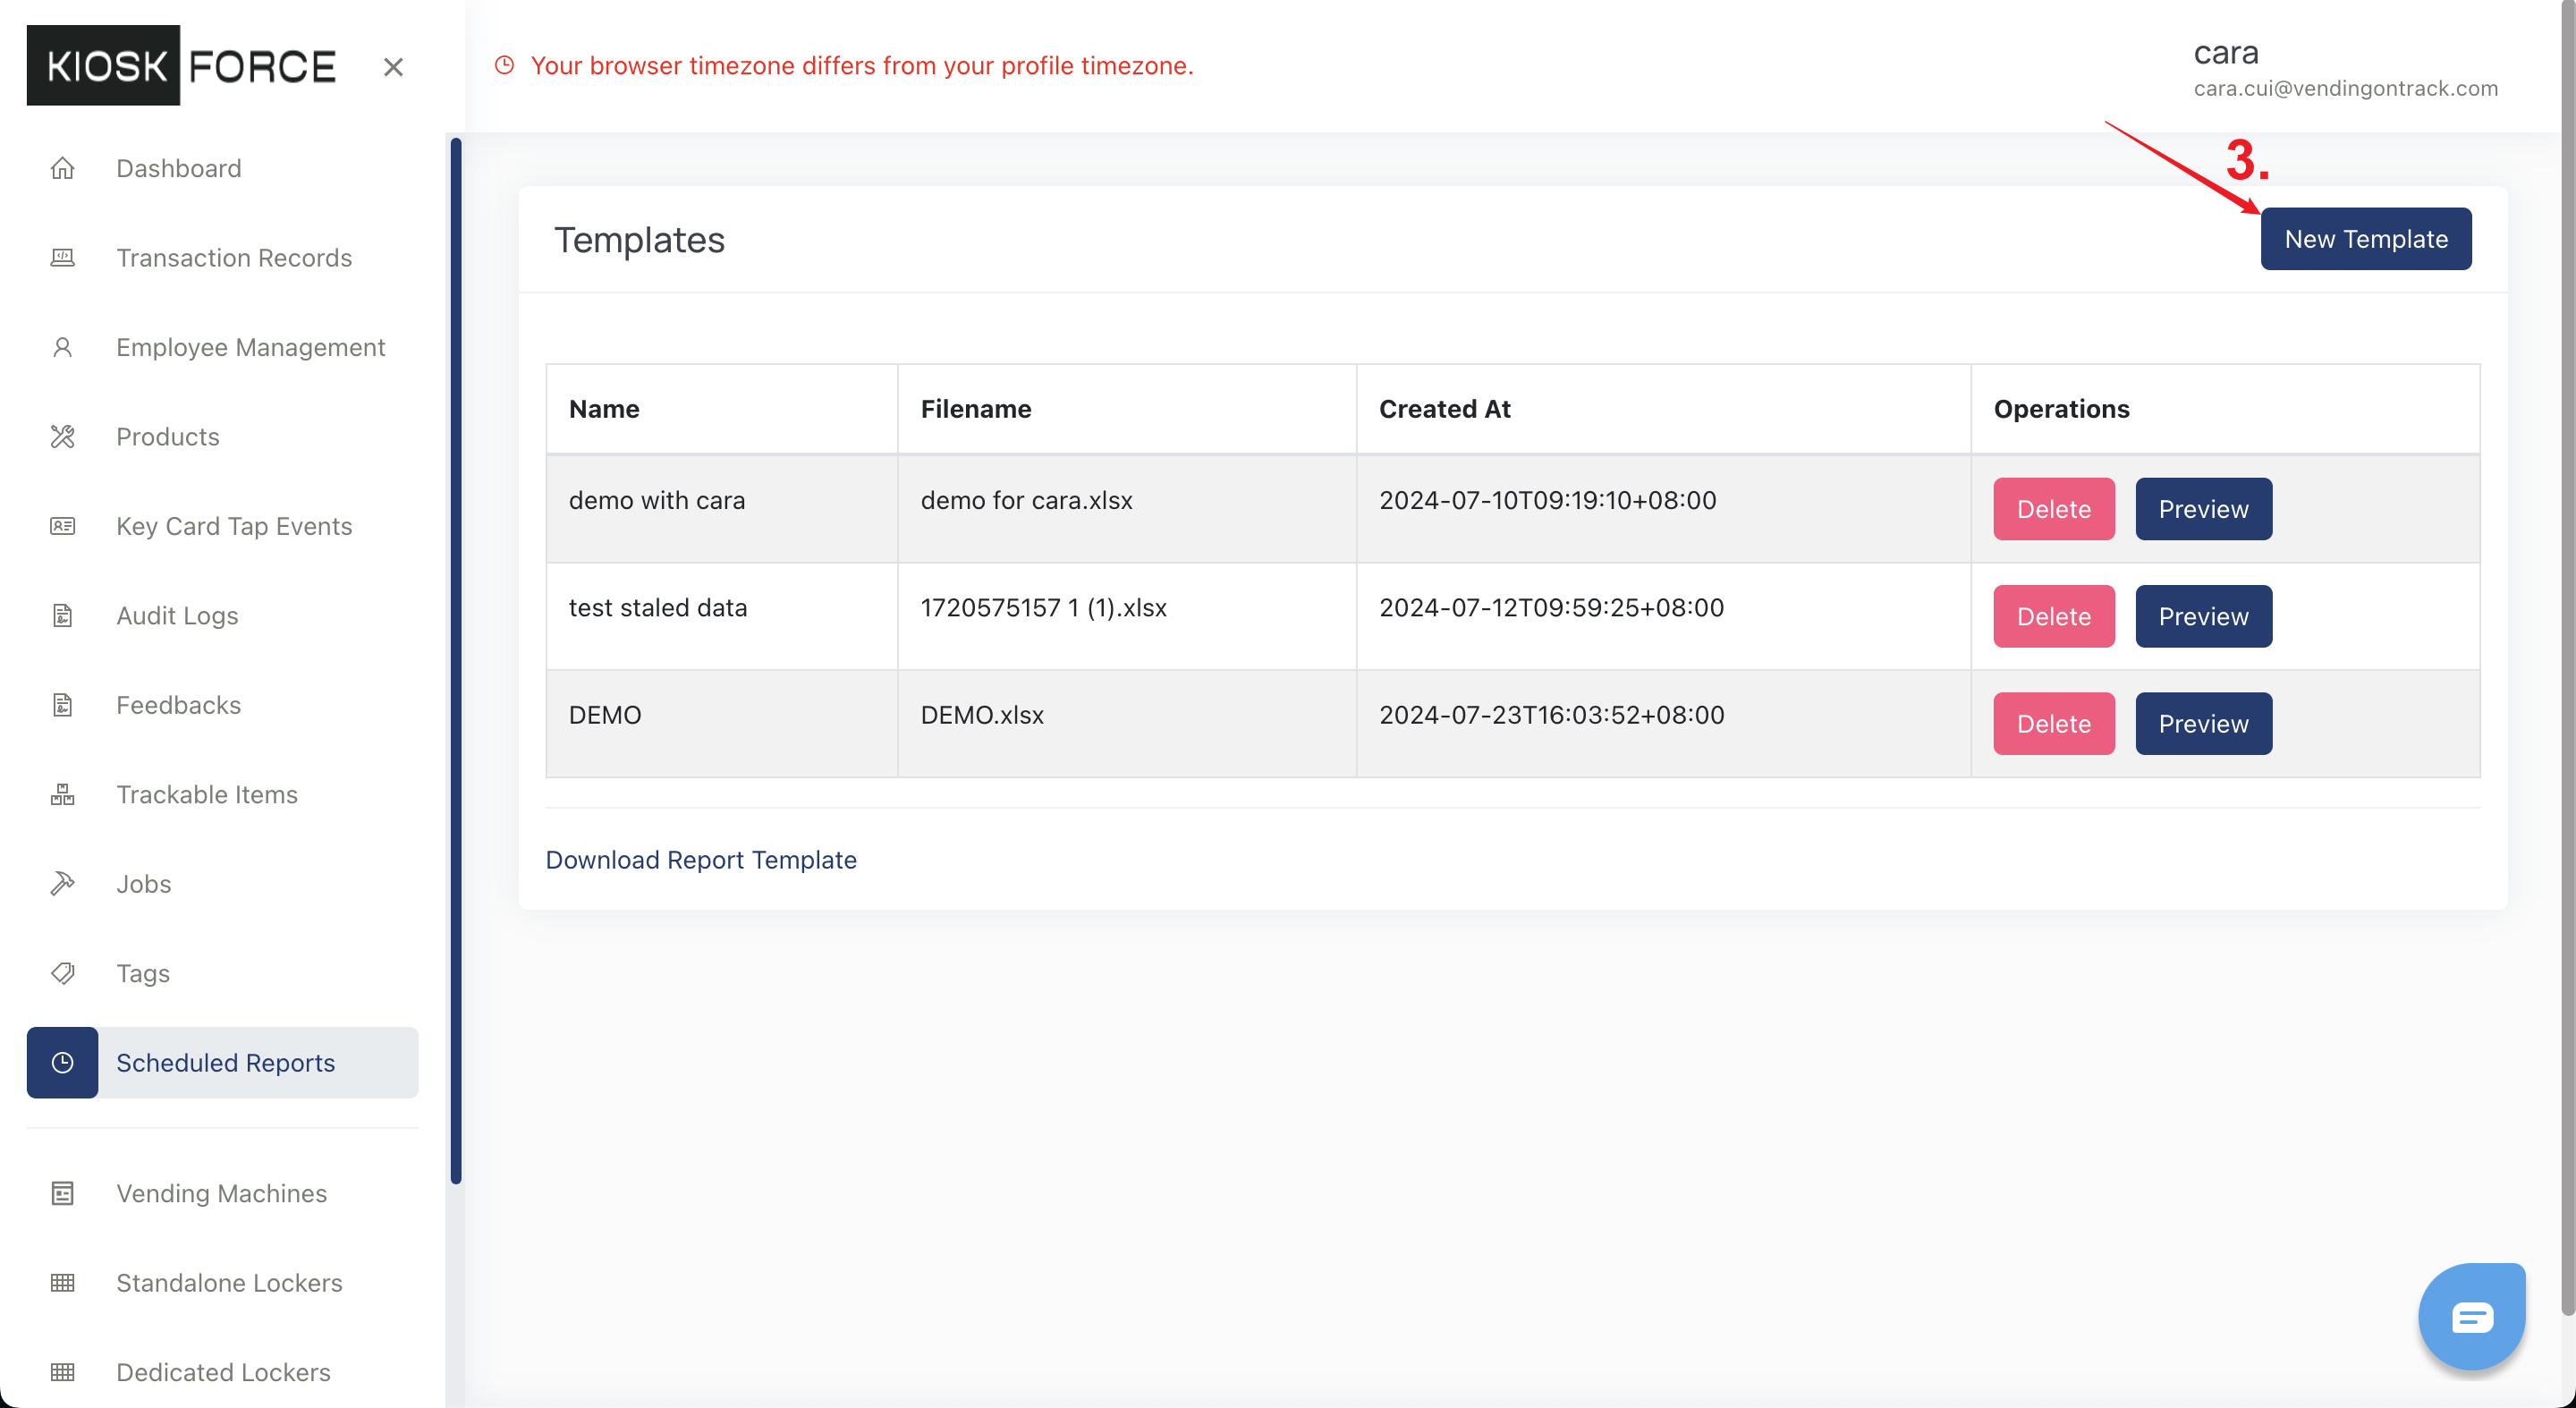
- On the Templates page, click New Template
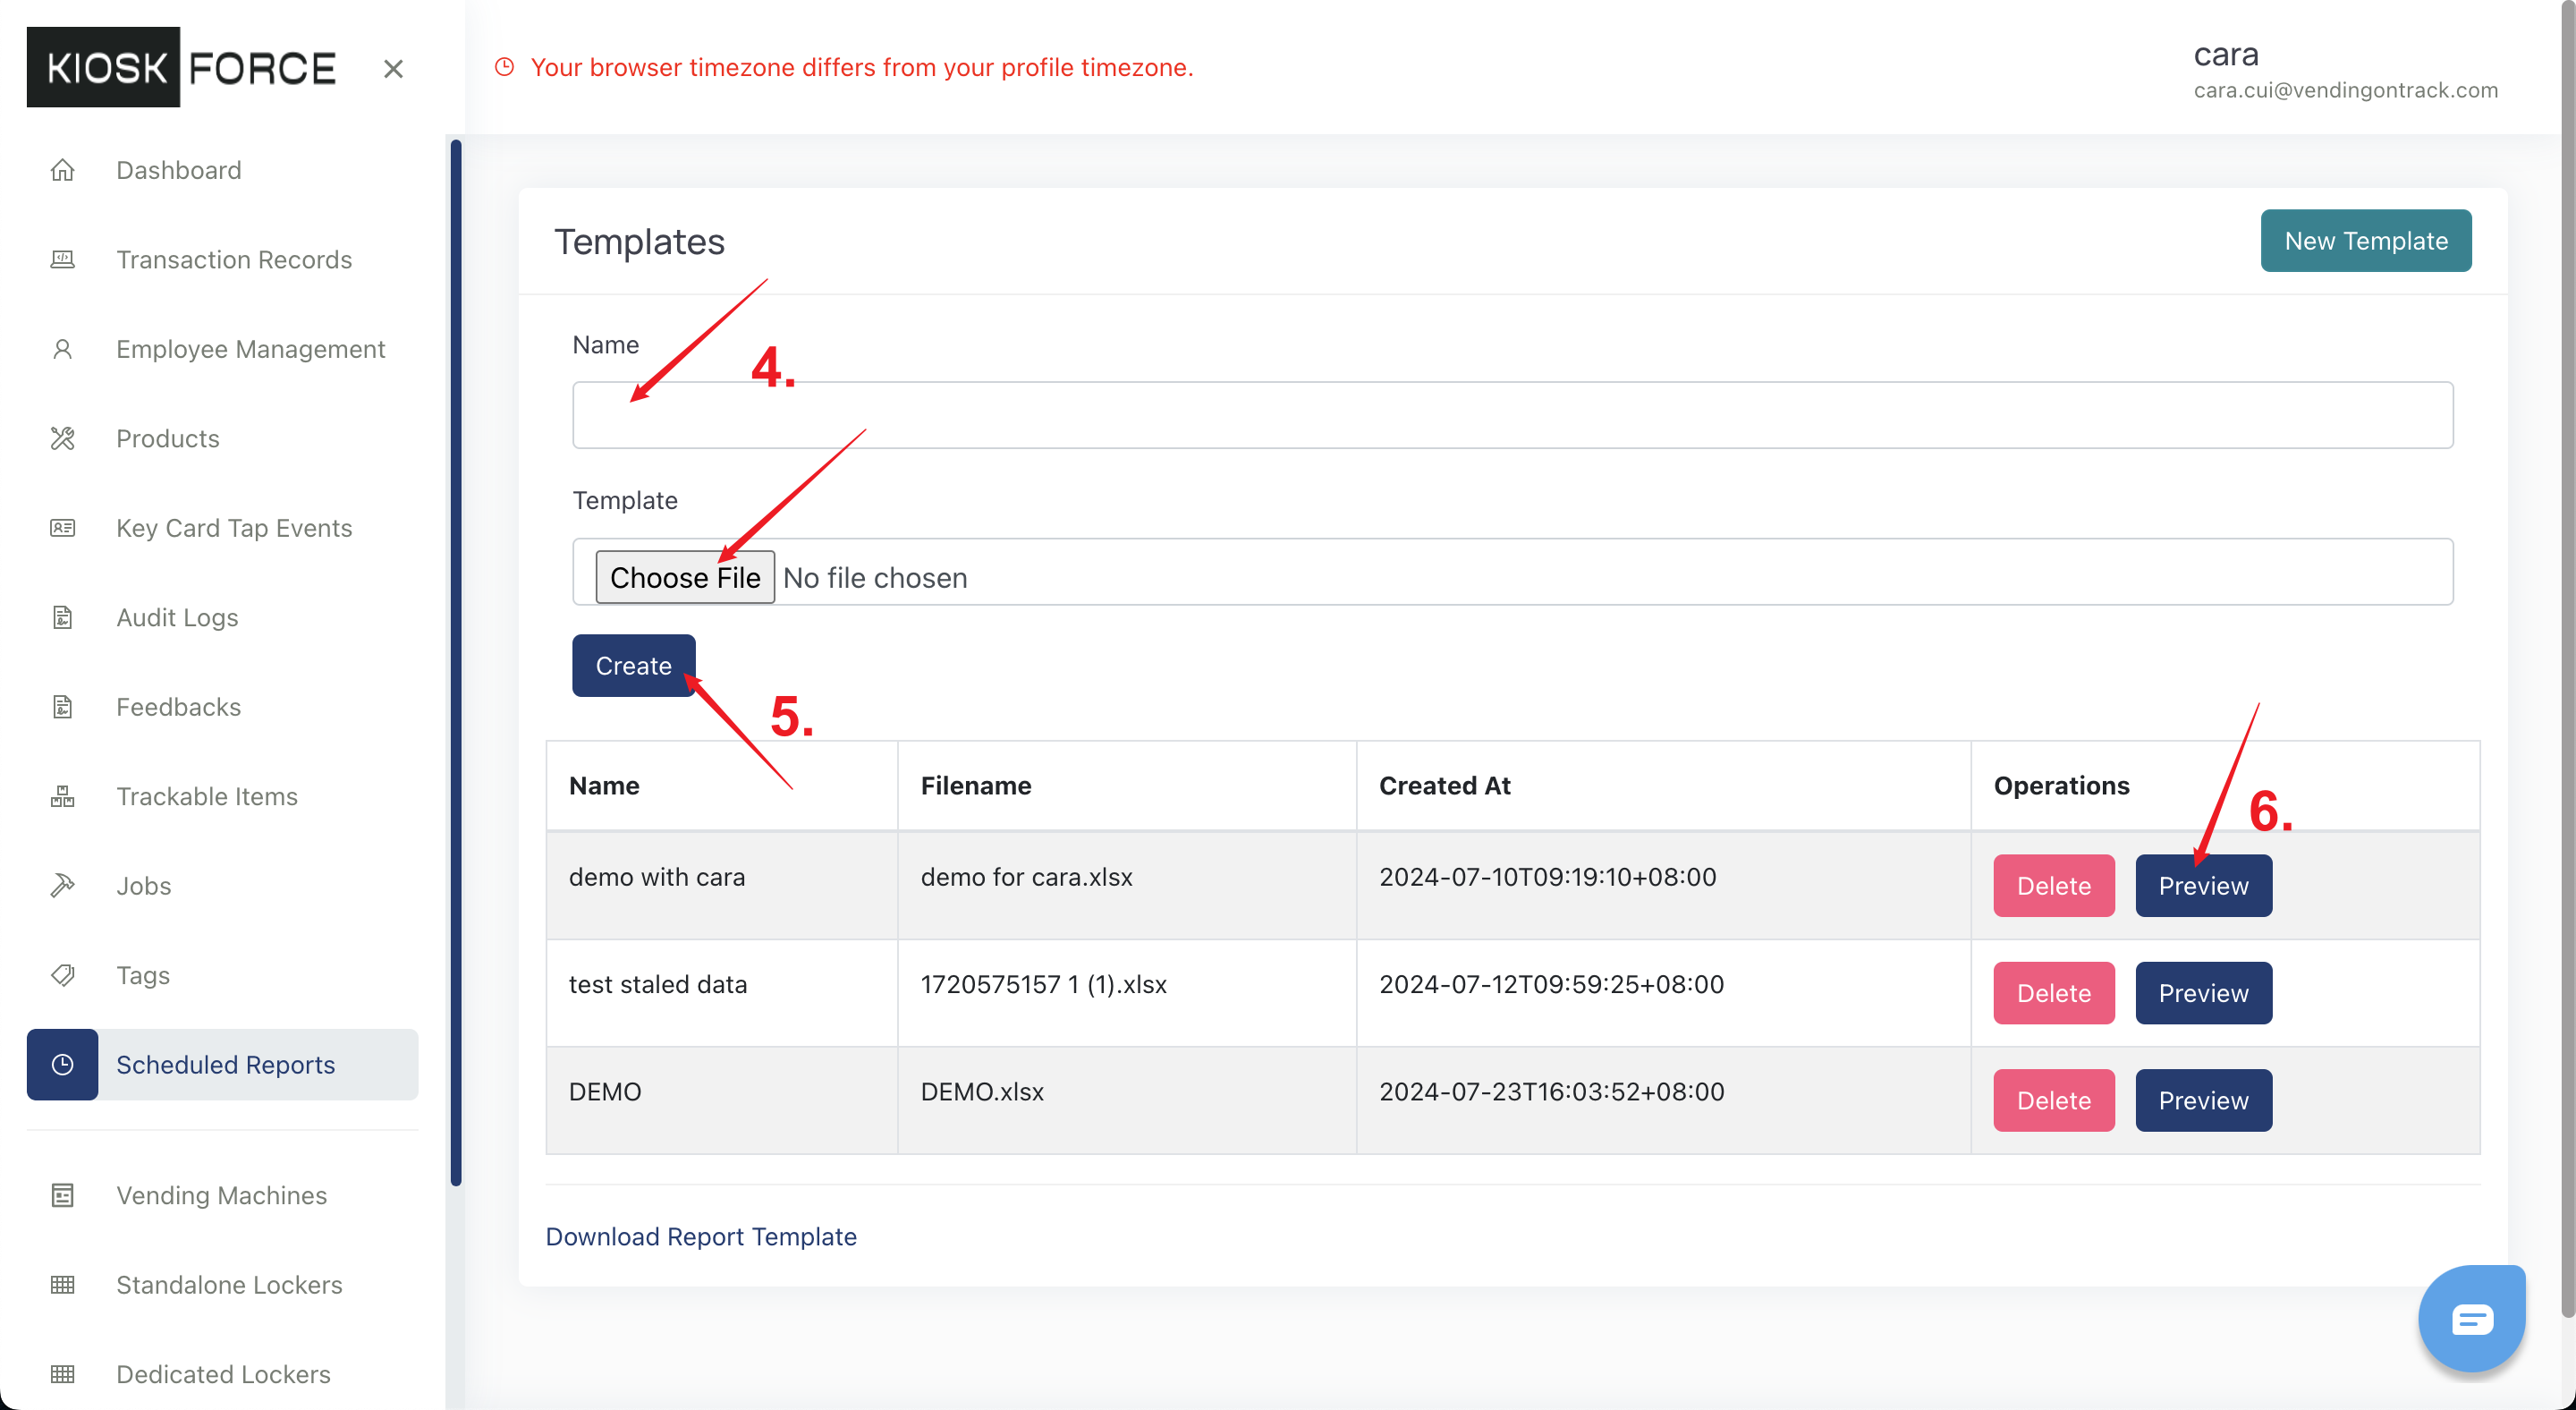
- On the pop-up window, input the template name and upload the template file
- Click Create to save
- In the Operations column, click the Preview button to generate a transaction report for the last 7 days
- Open the downloaded file in Microsoft Excel to check if the data automatically updates.
Schedule the Report
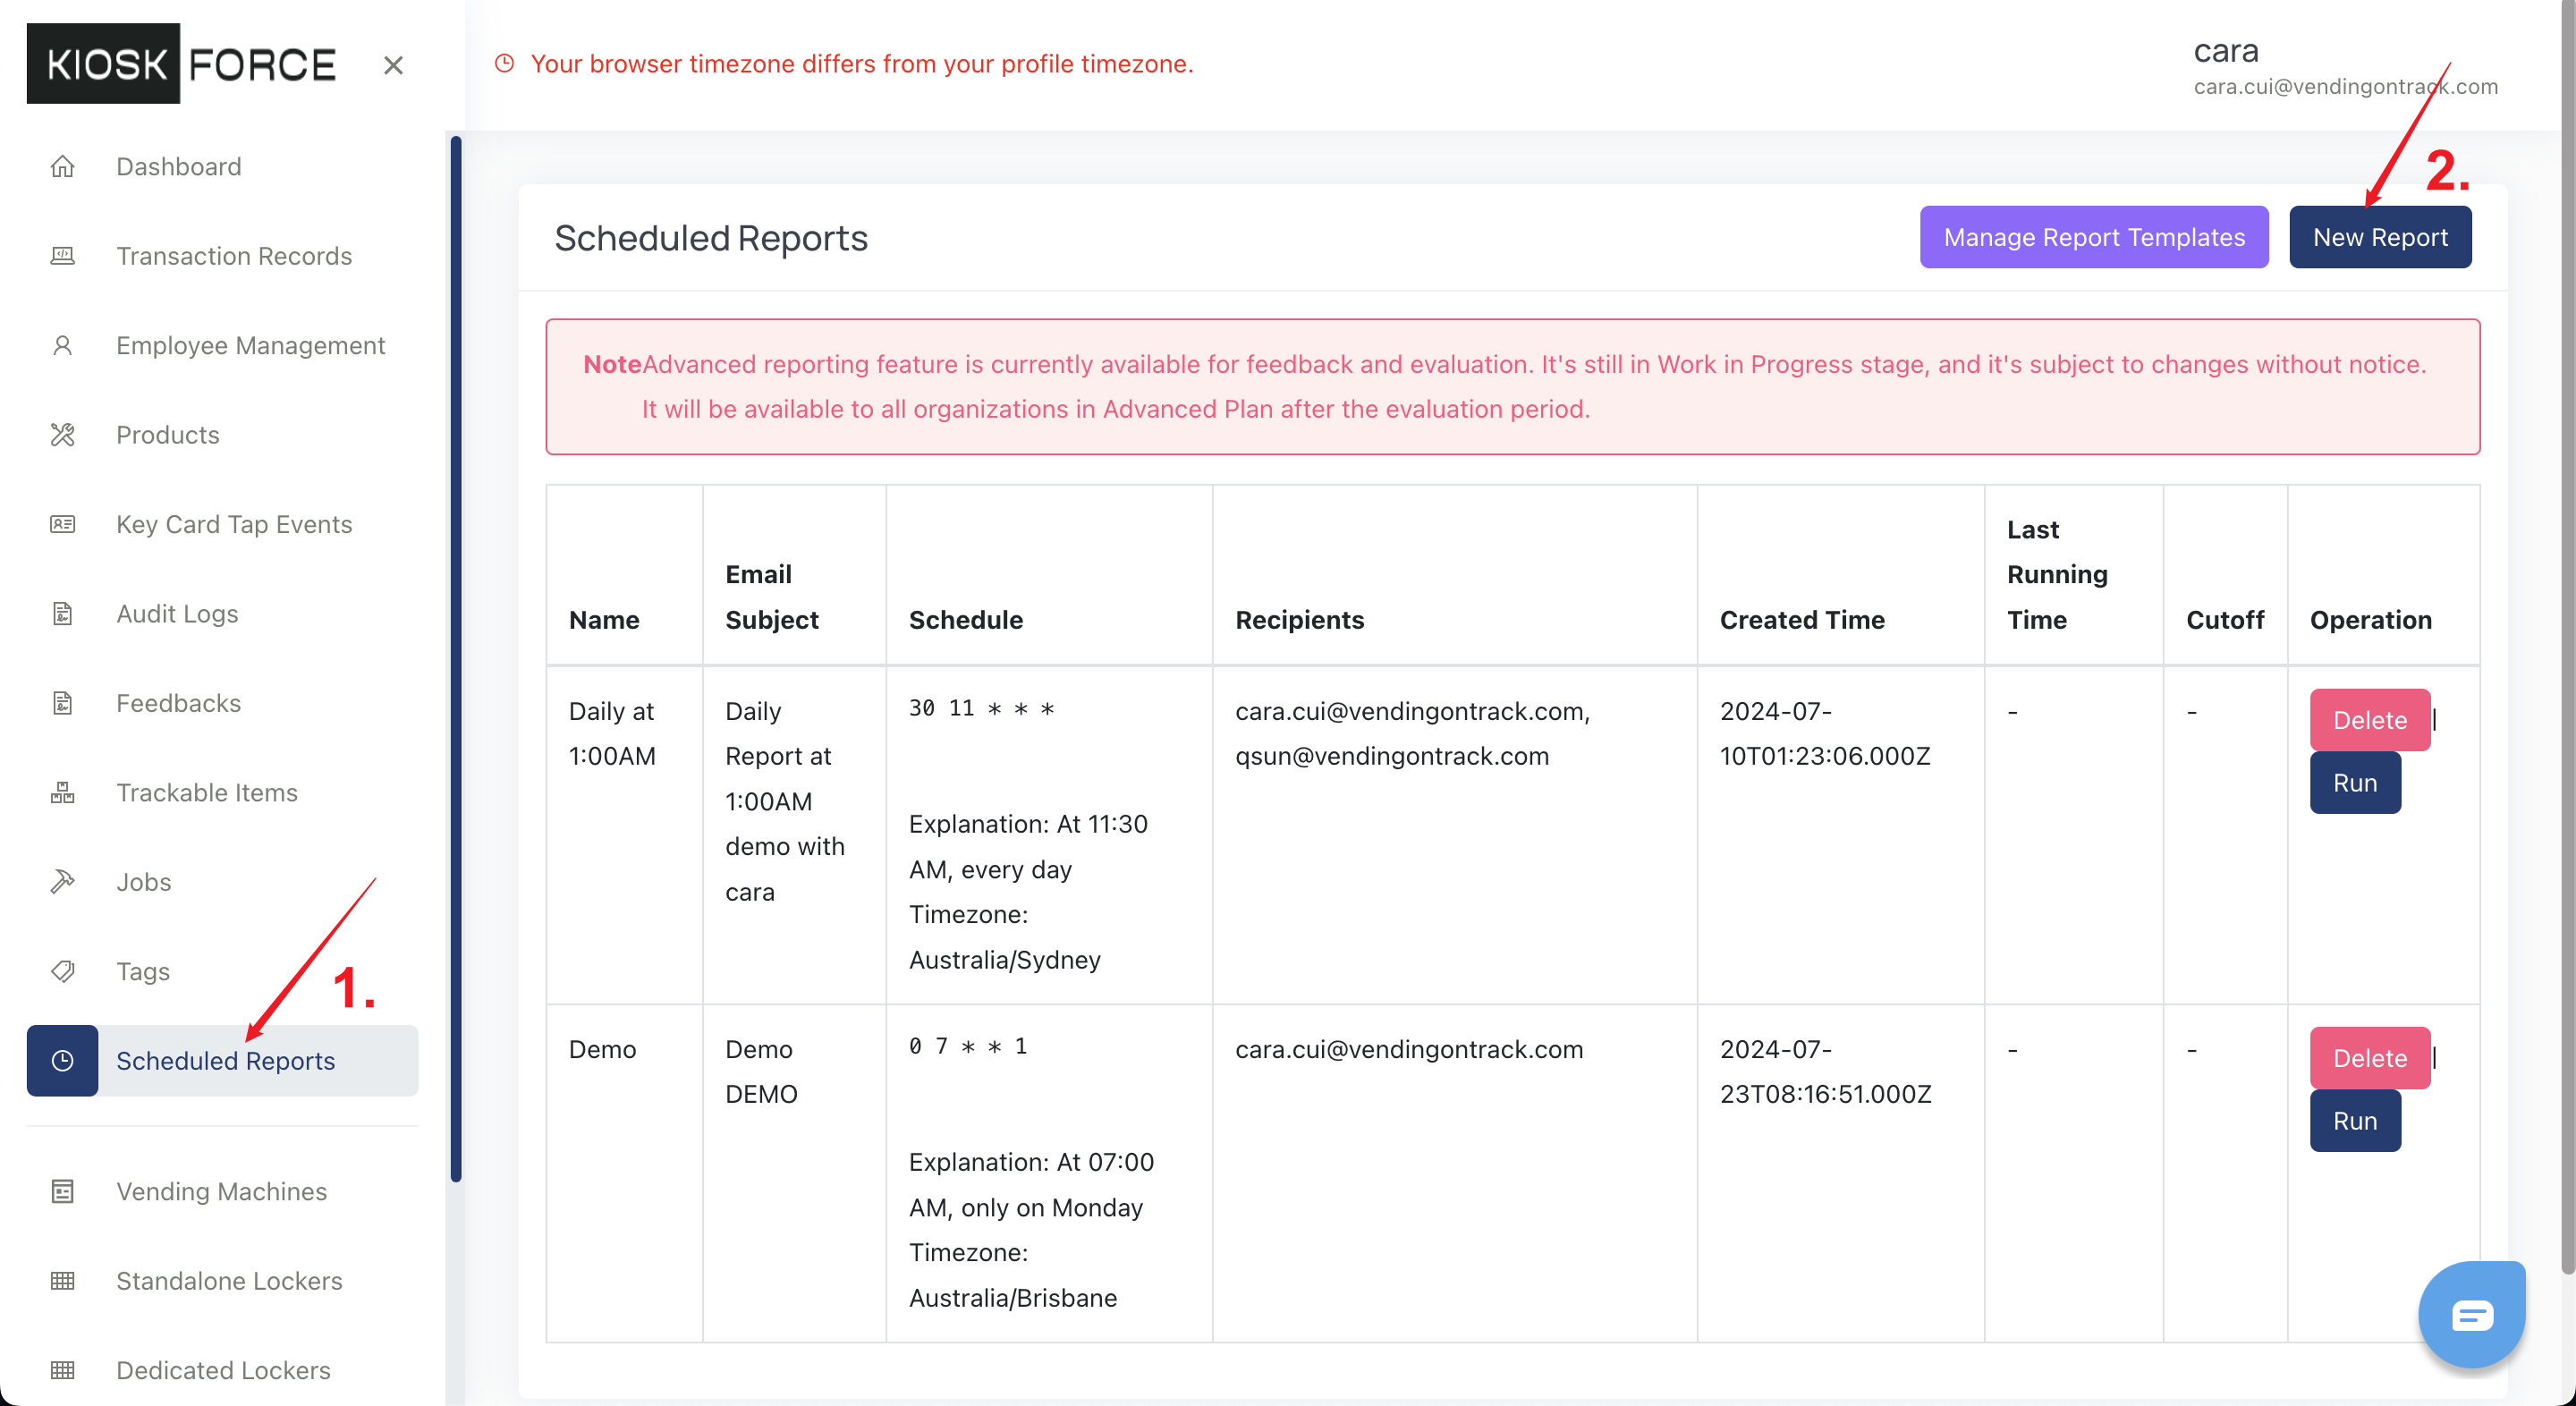
- Go to the Scheduled Reports page
- Click the New Report button
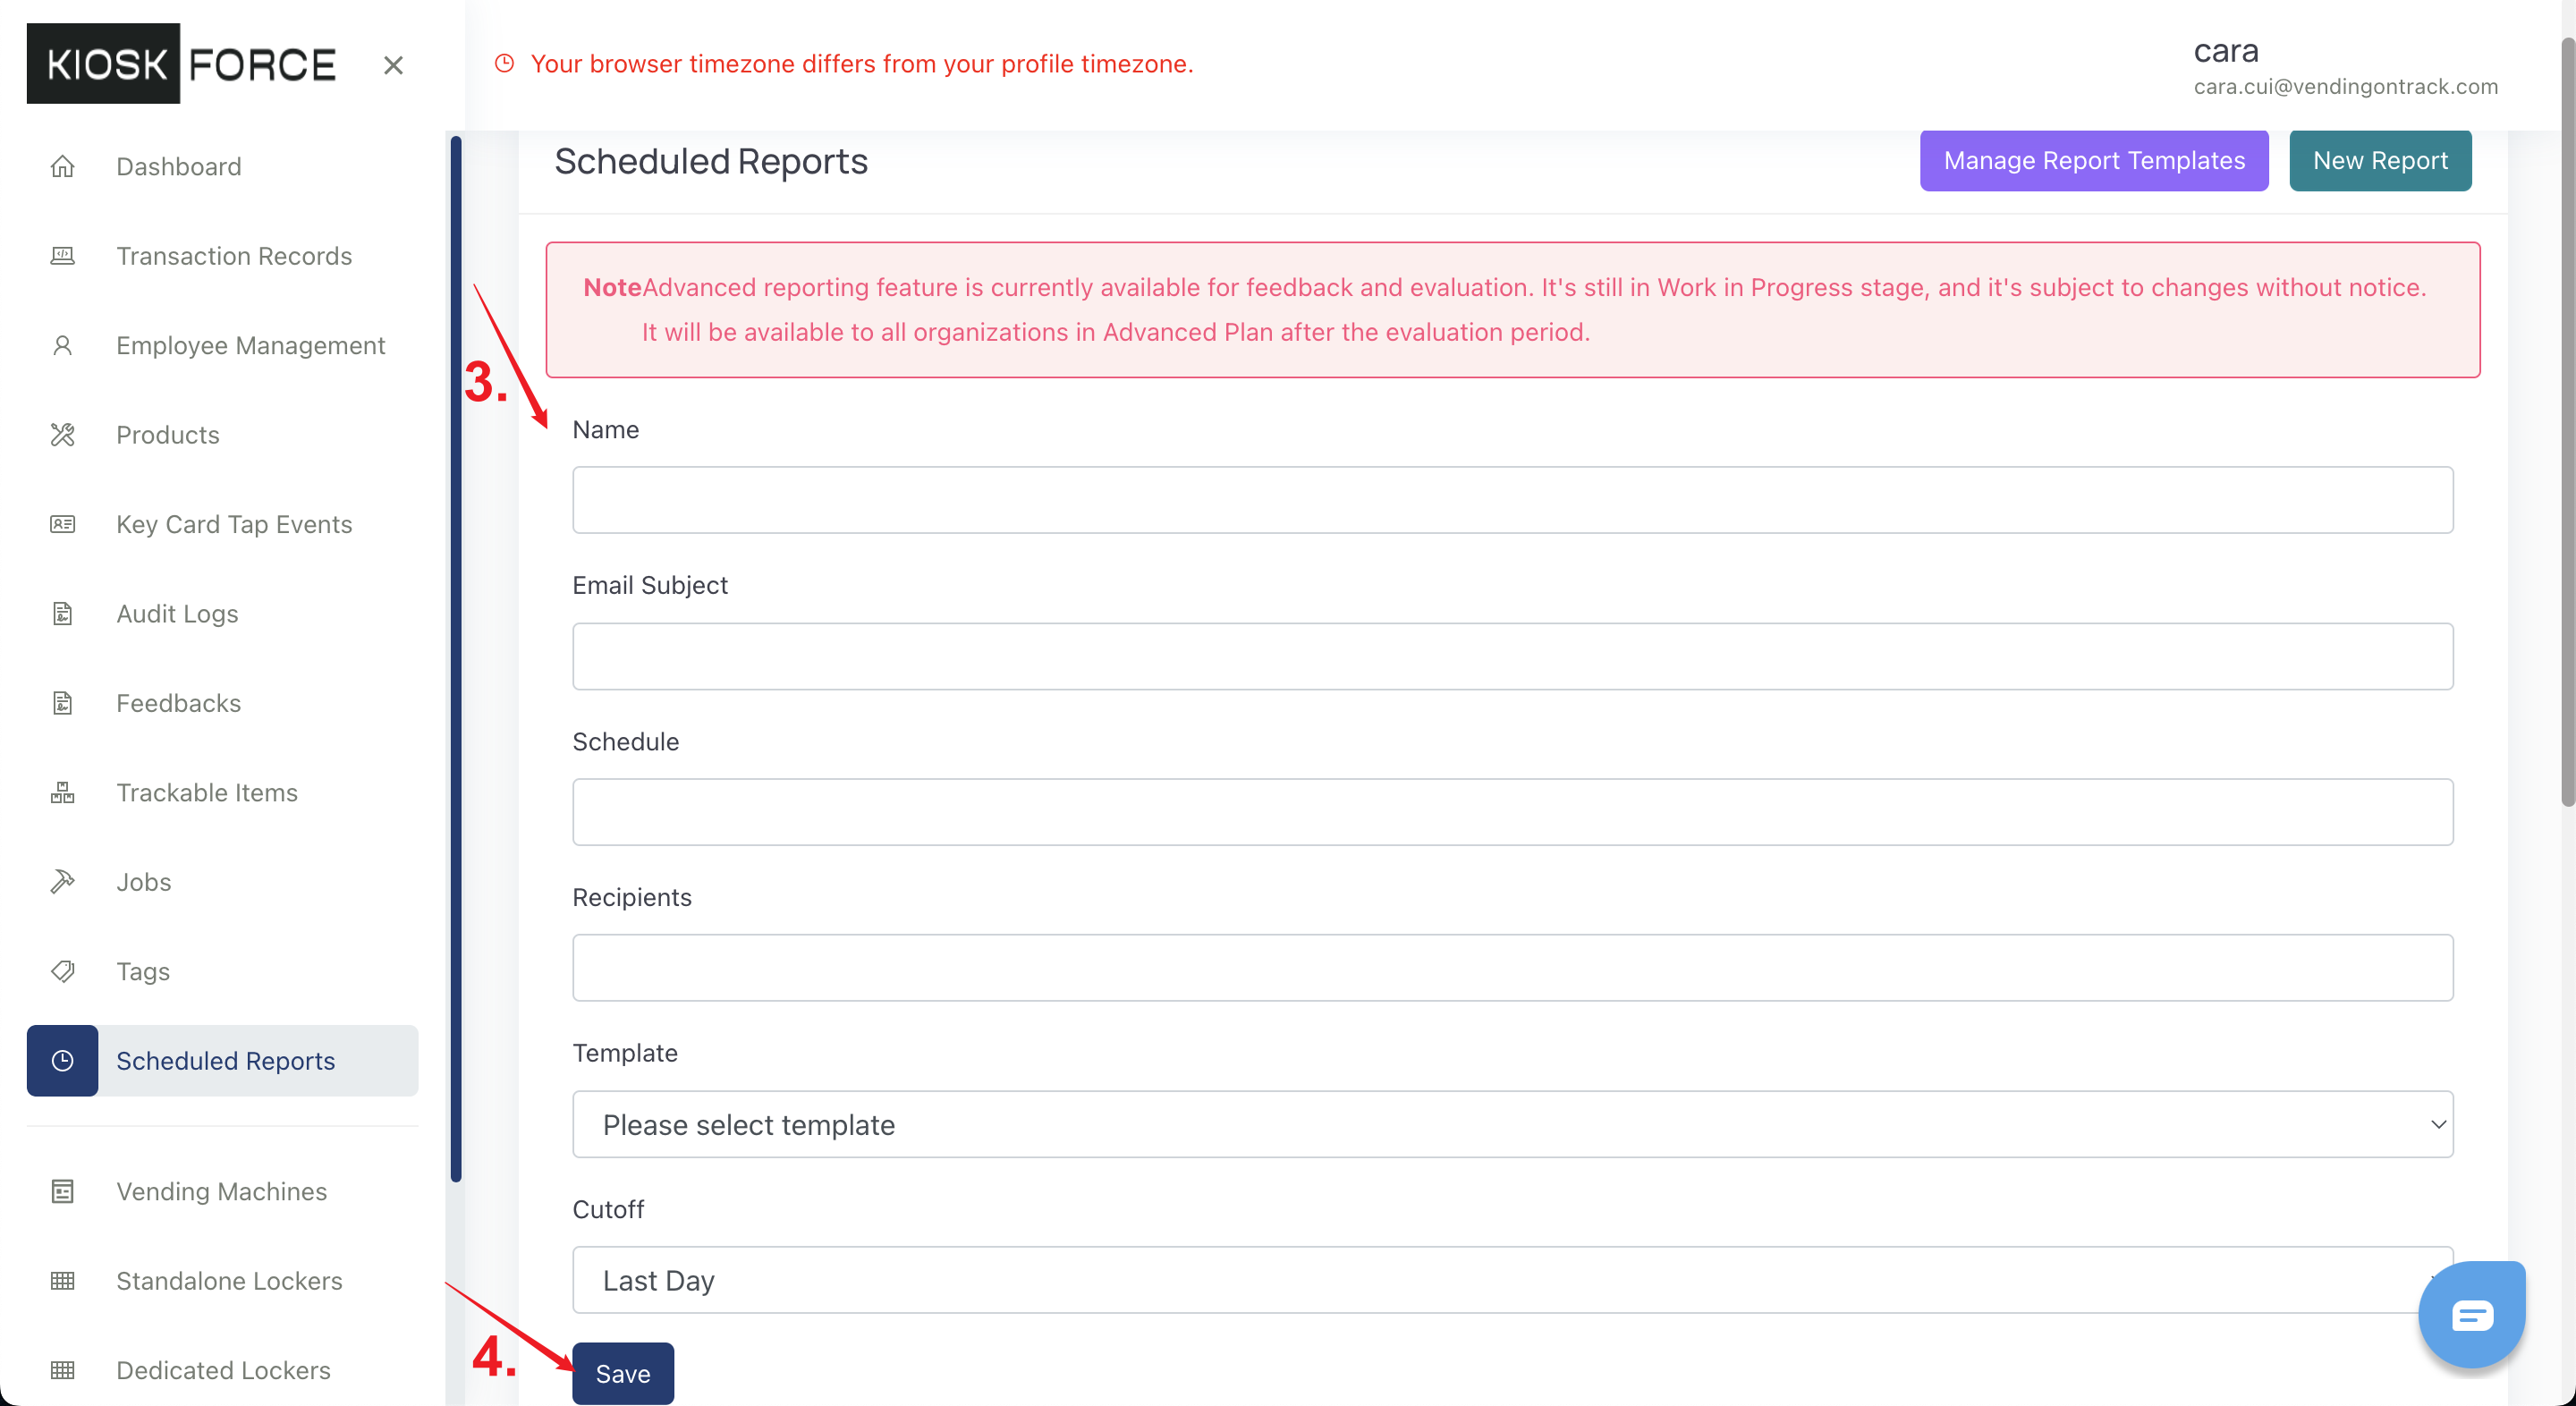
- On the pop-up window, input:
- Name - report name
- Email Subject - subject of the report email
- Schedule - report sending time in the Crontab format, which is composed of 5 parts: minute, hour, month day, month, week day (On the Crontab website, you can get an explanation of each component.) For example, if you want the report to be sent out every Monday at 7 am, the Schedule should be 0 7 * * 1.
- Recipients - email addressees
- Template - report template
- Cutoff -
- Last Day - the report will include the transaction records of yesterday
- Seven Days - the report will include the transaction records of the last 7 days
- Sunday Week - the report will include the transaction records of the previous Sunday to Saturday
- Monday Week - the report will include the transaction records of the previous Monday to Sunday
- Last 28 days - the report will include the transaction records of the last 28 days
- Last Calendar Month - the report will include the transaction records of the last calendar month
- Click Save.
Frequently Asked Questions
Q1: Can I use any spreadsheet software besides Microsoft Excel?
No, the documentation explicitly states: “Microsoft Excel is the only tool you can use to modify and save the report template.” The NOTES section emphasizes this requirement, and the template must be saved in Excel format (.xlsx). CSV files will not work in the system.
Q2: What does “Refresh data on file open” mean and why is it important?
The documentation states: “After inserting any tables or charts, check the Refresh data on file open box.” This Excel feature ensures that when the report is generated and emailed, the pivot tables and charts will automatically update with the new transaction data. Without this setting, the charts and tables would show outdated information.
Q3: How do I understand the Crontab schedule format?
According to the documentation, the Schedule field uses “Crontab format, which is composed of 5 parts: minute, hour, month day, month, week day.” The example provided shows: “if you want the report to be sent out every Monday at 7 am, the Schedule should be 0 7 * * 1.” The documentation recommends using the Crontab website (https://crontab.guru/) to get explanations of each component.
Q4: What’s the difference between the various Cutoff options?
The documentation defines each Cutoff option’s data range:
- Last Day - transaction records of yesterday only
- Seven Days - last 7 days of transactions
- Sunday Week - previous Sunday to Saturday (full week starting Sunday)
- Monday Week - previous Monday to Sunday (full week starting Monday)
- Last 28 days - 28 days of transaction history
- Last Calendar Month - all transactions from the previous calendar month
Q5: Can I test my template before scheduling it?
Yes, the documentation describes a Preview feature in the Operations column. When you click Preview, it will “generate a transaction report for the last 7 days.” You should then “Open the downloaded file in Microsoft Excel to check if the data automatically updates” to verify your template works correctly before scheduling.